The odd thing about wet room conversions is that the mistake often doesn’t show up while the installer is working. It appears after the tiles dry, the grout goes hard, and you start using the shower normally-then waterproofing failures announce themselves with a damp tide mark, a musty smell, or a ceiling stain in the room below.
It catches homeowners out because the finish can look flawless on day one. The problem sits underneath, where water travels slowly and quietly, finding the first weak seam.
The mistake: treating tiles and grout as the waterproof layer
Many wet rooms fail for one simple reason: the build relies on tiles, grout and silicone to stop water. Tiles are water-resistant, not waterproof. Grout is porous, and silicone joints are maintenance items that shrink, split and peel over time.
A proper wet room is waterproofed before a single tile goes on. That waterproof layer is a continuous “tank” (usually a liquid membrane, sheet membrane, or a full tanking kit) that guides any water back to the drain rather than into the floor structure.
If the waterproofing is patchy, interrupted, or skipped in “low risk” areas, the wet room can look perfect until the first few weeks of use prove otherwise.
Why it shows up after the tiles dry (not during the work)
The delay is what makes this mistake so convincing. While adhesives and grout are curing, the room often isn’t being soaked like it will be in real life, and small leaks don’t always travel to a visible point straight away.
Once you start showering daily, moisture builds in layers. It wicks through grout lines, sits behind tile, and runs along boards and joints until it finds an edge-door threshold, corner, pipe penetration, or the ceiling below. Only then do you see the evidence.
Typical “late” symptoms include:
- Grout darkening that never fully dries out
- A persistent damp smell despite good ventilation
- Bubbling paint or swollen skirting outside the wet area
- Cracked grout lines appearing within weeks
- Staining on the ceiling beneath, often not directly under the shower
The most common weak points installers miss
Even when a membrane is used, waterproofing failures usually happen at details rather than on a flat wall. Wet rooms demand careful work where surfaces change direction or materials meet.
Look out for these frequent misses:
- No reinforcement tape at corners and joints (the membrane thins at movement points)
- Poor sealing around pipework (shower valves and waste pipes need proper collars/grommets)
- Unprotected floor-to-wall junctions (water sits here longest)
- No tanking behind the vanity or WC in compact rooms where splash is inevitable
- Incompatible products mixed (primer, membrane, adhesive and grout not designed as a system)
A wet room can survive minor splashes with mediocre detailing. It rarely survives daily drenching without it.
The “it drains, so it’s fine” trap: falls that are almost right
Another conversion mistake that appears after drying is a floor that seems to fall correctly, yet still holds water in shallow puddles. That standing water keeps grout saturated and increases the time moisture spends searching for a route underneath.
This usually happens when:
- the fall is too gentle, or uneven across the floor
- the drain isn’t set perfectly flush
- large-format tiles are forced over complex gradients
- the wrong former tray is used (or none is used at all)
If you regularly squeegee water towards the drain, the wet room is doing extra work your waterproofing should not have to endure.
What to do if you suspect a problem (before it becomes a rebuild)
If you’re seeing early signs, act quickly. Water damage spreads; the sooner you confirm the cause, the more likely you can limit the repair to a section rather than the whole room.
A practical next step list:
- Stop “testing” it with extra water. Normal use is enough to worsen the issue.
- Check the easy culprits first: split silicone, missing grout, loose trim, cracked tiles.
- Photograph the symptoms over a week (same angle, same time of day) to show progression.
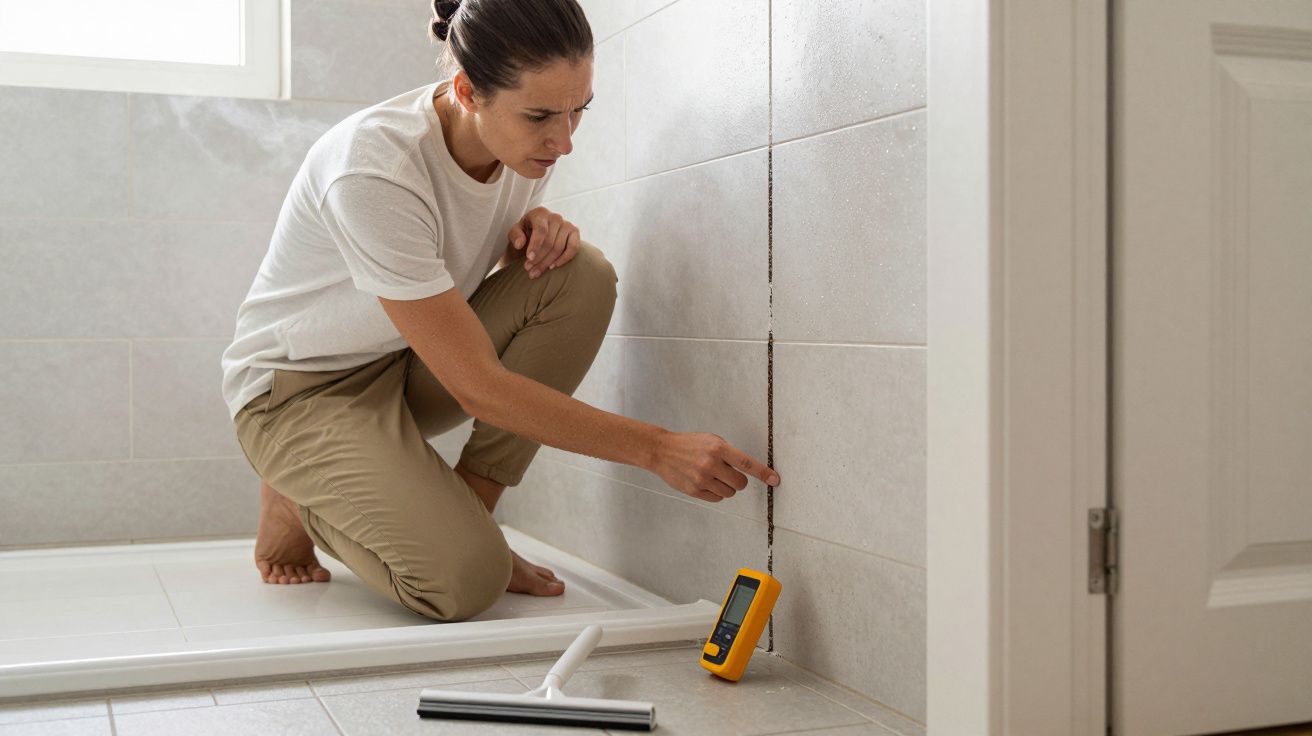
- Get a professional leak investigation if there’s staining below-moisture meters and thermal checks can narrow the source.
- Assume the membrane is involved until proven otherwise; surface resealing rarely fixes a tanking defect.
If a contractor suggests “just re-grout and reseal”, ask what sits behind the tiles and how continuity is maintained at corners and penetrations. A cosmetic refresh can buy time, but it doesn’t rebuild a missing waterproof system.
How to avoid it in a new conversion
The safest wet room conversions are treated like a water containment project, not a tiling job. That means choosing a proven waterproofing method and insisting on detail work that is boring, slow, and absolutely essential.
Use this checklist before any tiles go on:
- Waterproofing system specified (brand + method), not “we’ll tank it”
- Primer used where required, with correct drying times
- Reinforcement tape in corners and board joints
- Proper pipe collars and seals around penetrations
- Floor former/drain system designed for wet rooms, not adapted on site
- A flood/leak test agreed where practical (timed and documented)
That last point matters because it catches the exact problem this article is about: the mistake that only becomes obvious once water has time to travel.
A quick way to judge the risk in your own bathroom
If your wet room has tiles directly onto standard plasterboard, or you were told grout is “waterproof when sealed”, treat that as a warning sign. The finish can still look immaculate while water slowly works on the structure behind it.
In wet rooms, the quality you pay for is often invisible. By the time the visible symptoms appear-after the tiles dry and life returns to normal-the real repair is usually underneath.


Comments (0)
No comments yet. Be the first to comment!
Leave a Comment