Warm tiles, a perfect grout line, and the quiet confidence that the job is “done”. Then, months later, the musty whiff returns and a darker patch appears near the bath. Bathroom pipework is meant to sit invisibly behind walls and floors, but concealed joints can turn that neat finish into a slow leak you don’t see until it has already spread.
It’s the kind of renovation error that doesn’t announce itself with a burst pipe. It drips, swells, softens and stains. And because it’s hidden, you end up chasing symptoms rather than fixing the cause.
The mistake that looks like “tidy work”
You can renovate a bathroom twice: once for what you see, and once for what you’ll never see again. The trouble starts when the invisible side is treated like an afterthought-especially on a fast refit where everything has to line up with tiles, taps and time.
The classic version is simple. A fitter makes a connection where it’s convenient, not where it’s accessible. Then the wall is boarded, tanked, tiled and sealed, and the joint is now effectively part of the building.
It looks clean. It photographs well. It’s also a gamble.
Why concealed joints fail so expensively
Most leaks behind tiles aren’t dramatic. They’re persistent. A compression fitting that’s slightly under‑done, a push‑fit that wasn’t fully inserted, a flexi hose kinked tighter than it wants to be-any of these can hold… until heat cycles and vibration do their slow work.
Once water gets behind tile backer or into a stud wall, it doesn’t need much volume to cause damage. It only needs time. Adhesive can soften, grout can discolour, timber can take on moisture, and mould can set up shop in the dark.
There’s also a psychological trap: if it’s hidden, it feels “protected”. In reality, it’s harder to monitor, harder to service, and far more disruptive to put right.
The most expensive leaks are the ones you can’t see, because the investigation costs as much as the repair.
What good practice actually looks like (before the first tile goes on)
You’re not trying to make bathroom pipework pretty. You’re trying to make it reliable and serviceable.
That usually means designing for three things: access, minimal joints, and proven materials. In practical terms:
- Keep joints out of walls and floors where possible; run continuous pipe where you can.
- If a joint must be concealed, use the right type (often soldered or press-fit copper, or manufacturer-approved systems installed to spec) and protect it correctly.
- Fit service valves where they’ll be reachable later, not where they’re most convenient today.
- Plan access panels for shower valves, bath traps, and any connections you may need to inspect.
If your layout forces compromises, make them deliberately and document them. “We had to” is not a strategy; it’s a future invoice.
The tell-tale places installers cut corners
Certain spots invite “just one joint” thinking:
- Behind shower mixer valves and diverters
- Under built-in baths with no removable panel
- Inside boxed-in soil stacks or vanity units with tight backs
- Within stud walls where pipes had to shift around a niche or a frame
These aren’t automatically wrong locations. They’re just the areas where access gets forgotten first.
A quick sanity-check you can do during a renovation
You don’t need to be a plumber to ask the right questions at the right time. Do it before boarding and tiling, when changes are still cheap.
- Ask where the shut-offs are. You want isolation for the basin, WC, bath/shower where practical.
- Ask what fittings are being concealed. If the answer is vague, pause.
- Ask how it’s being pressure tested. Not a shrug. A method.
- Ask where the access points are. “None” should trigger a redesign, not reassurance.
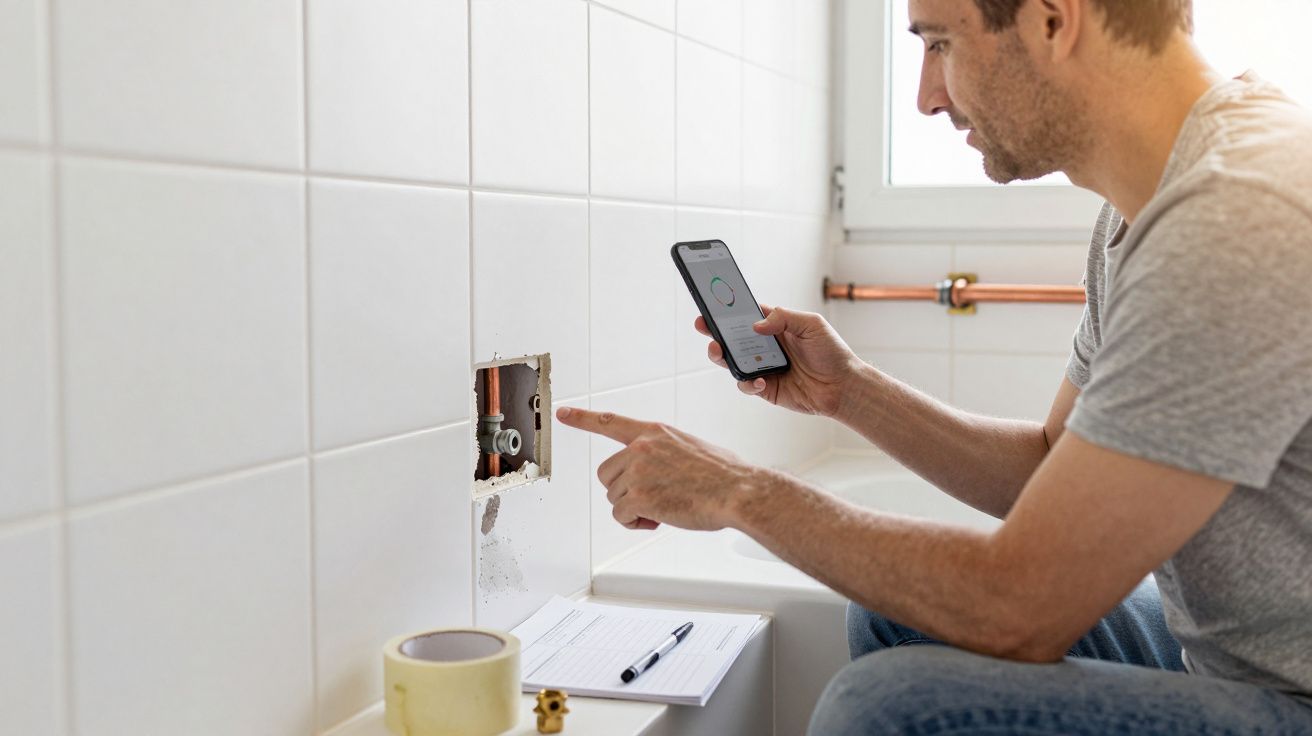
- Photograph the pipe runs. Wide shots and close-ups. Save them somewhere you’ll remember.
Those photos become your X-ray later. They can save you from ripping out the wrong wall.
Signs you’ve already got a hidden problem
Leaks behind tiles often look like “humidity” until they don’t. Watch for patterns that repeat:
- A damp or spongy feel near the bath edge or shower threshold
- Grout darkening that doesn’t fully dry out
- Paint bubbling on the other side of the wall
- A faint sewage smell near boxed-in pipework (waste leaks are sneaky)
- Unexplained drop in boiler pressure (for some heating/hot water setups)
- Mustiness that returns quickly after cleaning and ventilation
If you suspect it, don’t keep re-sealing the surface and hoping. Silicone is not a repair for a failing joint behind a wall.
If you must hide a connection, hide it like you mean it
Sometimes a concealed joint is unavoidable. The goal then is to make it robust, compliant, and as low-risk as possible.
- Use systems designed for concealment and follow the manufacturer’s method precisely.
- Sleeve and protect pipes where they pass through masonry or boards to prevent abrasion and noise.
- Avoid mixing incompatible metals without correct transition fittings.
- Keep electrical zones and waterproofing layers in mind-water and electricity don’t forgive “nearly”.
And insist on access to anything that’s likely to need maintenance: traps, valves, cartridges, pumps, macerators. If it moves, seals, or clogs, you want a way to reach it.
The bigger shift: from “finish” to “future-proof”
Renovations are obsessed with the final photo: the tile, the tap, the glow. Yet bathrooms are systems. Water under pressure goes in, water with soap and hair comes out, and everything in between has to survive daily use without being watched.
The smartest bathrooms aren’t the ones with the fanciest porcelain. They’re the ones where, if something fails, you can fix it without demolition.
| Risk | What causes it | Better approach |
|---|---|---|
| Slow leak behind tiles | Concealed joints with no access | Reduce joints; add access panels |
| Repeat mould and odour | Moisture trapped in voids | Proper waterproofing + leak-free connections |
| Expensive “find the leak” work | No photos / unclear routes | Photograph pipework before tiling |
FAQ:
- Is it always illegal or non-compliant to have concealed joints? Not always, but rules and best practice depend on the type of joint, location, and local regulations. The bigger issue is serviceability: if you can’t inspect or access it, any failure becomes destructive.
- What’s the worst place to hide bathroom pipework connections? Behind a tiled shower wall with no access route is high risk, especially around mixer valves and diverters. A tiny leak there can soak boards and framing for months.
- Can I just seal the tiles again if I see damp grout? Re-sealing might mask symptoms, but it won’t stop water escaping from a joint behind the wall. Persistent dampness needs investigation, not more silicone.
- What should I ask my fitter before the walls are closed? Ask where isolation valves are, what joints will be concealed, how testing is done, and where access panels will be. Then take photos of everything before it’s covered.


Comments (0)
No comments yet. Be the first to comment!
Leave a Comment